Table of Contents
How to Build and Use the Digital Custom Forms Feature #
The Forms module in the Admin Portal allows Global Admins to create custom digital forms for their team. These forms can be shared via the employee app, assigned to specific users, or made available in the library for unlimited use. Learn how to create, structure, and manage forms effectively.
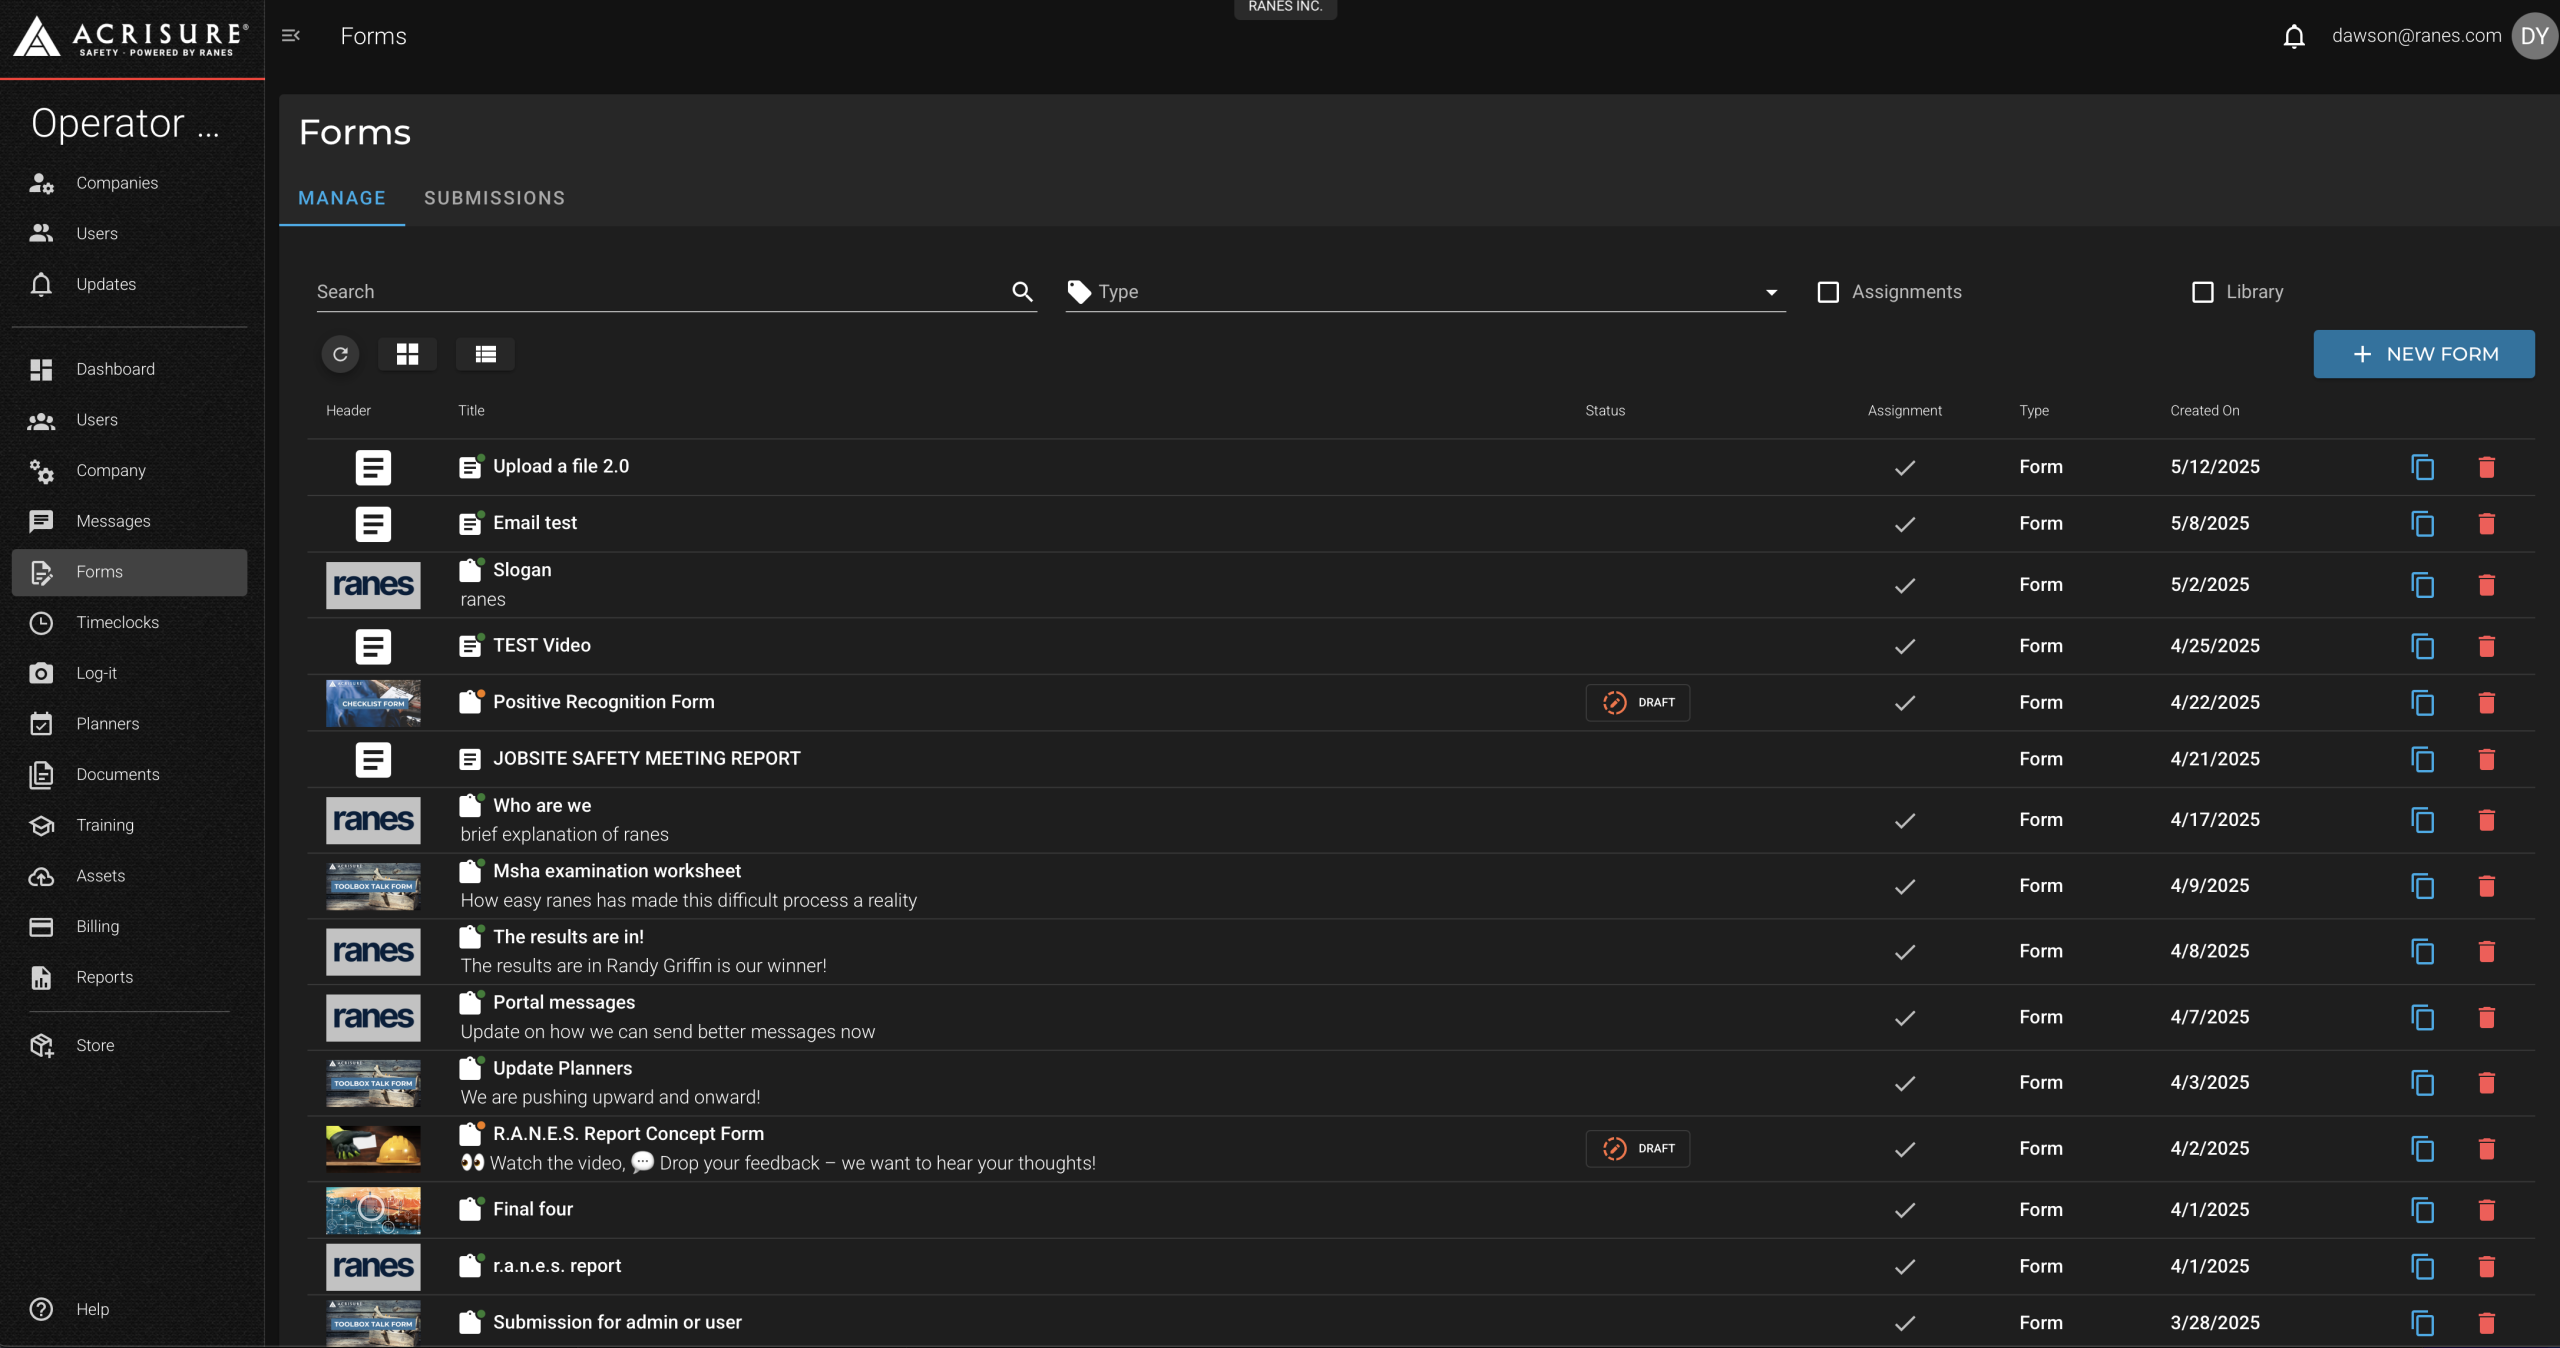
Accessing the Forms Module #
To begin creating and managing forms, follow these steps:
- Log in to the Admin Portal.
- From the left navigation bar, click on Forms.
- The Forms dashboard will display all previously created forms. You can:
- Search for forms using filters such as type, assignment, or library availability.
- Edit or delete existing forms using the corresponding icons.
- Click the New Form button to create a new form.
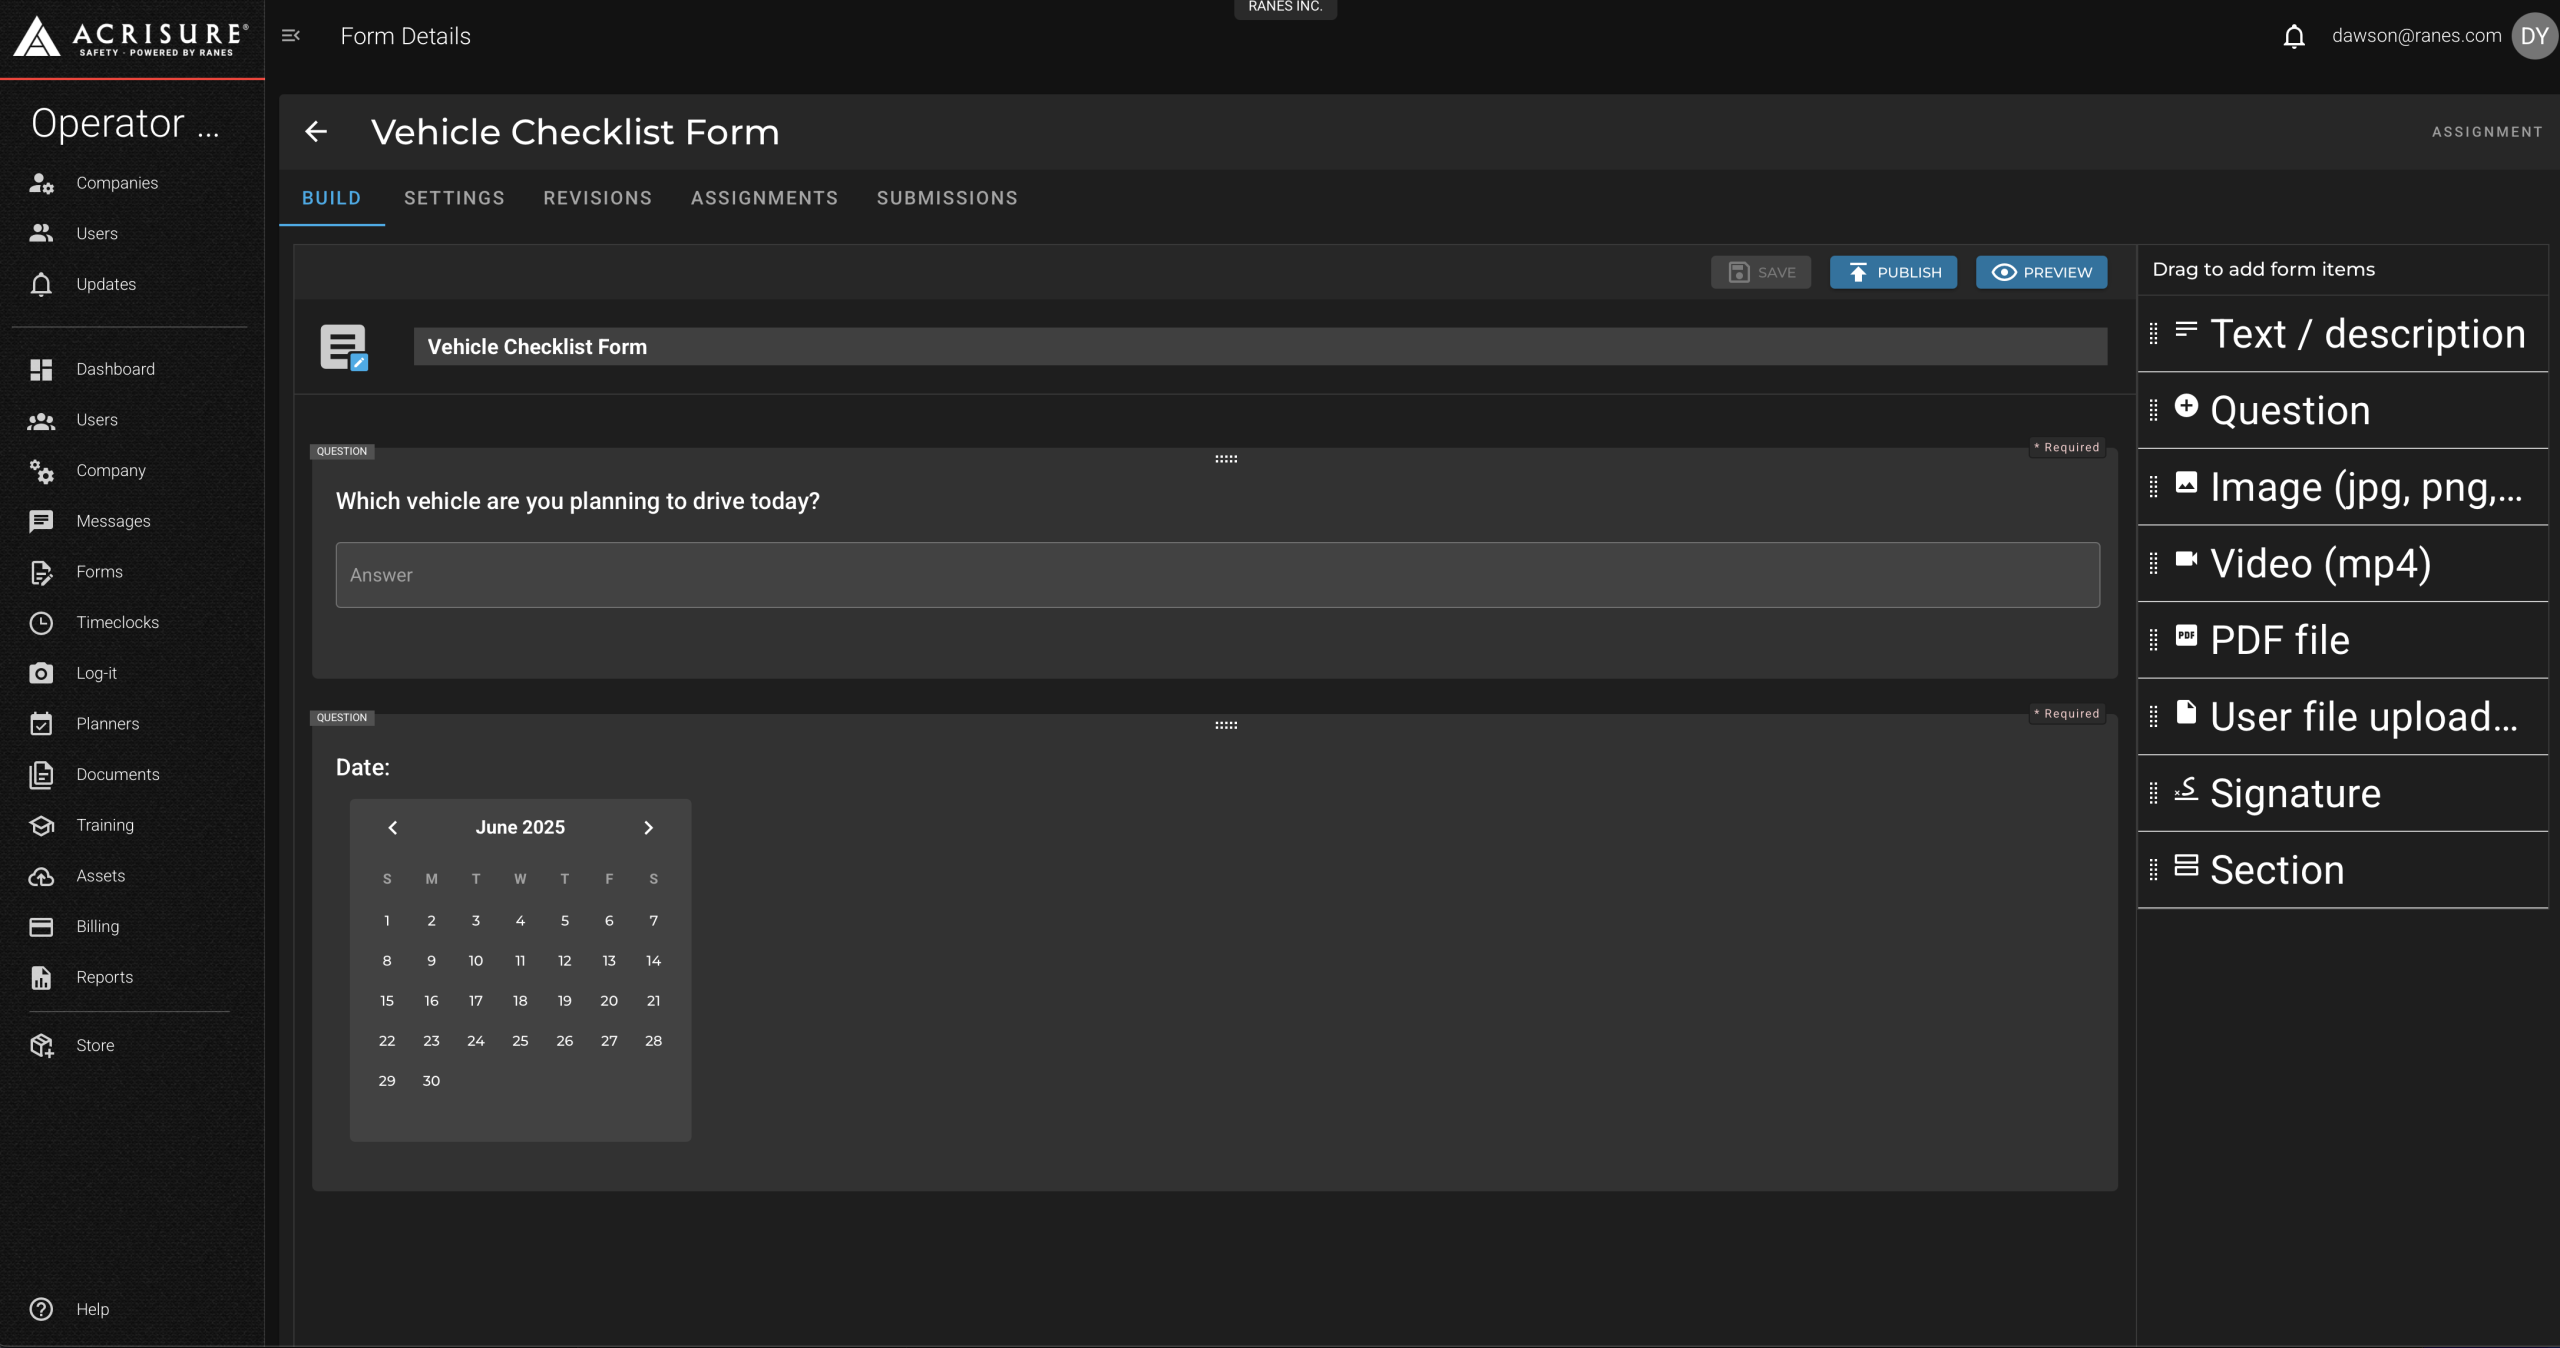
Creating a New Form #
To create a new form, follow these steps:
- Click the New Form button.
- Choose a template from the list or select Start Fresh to create a form from scratch.
- Enter the Form Builder, where you can use the drag-and-drop method to add elements such as:
- Text Boxes: Add descriptions or instructions.
- Question Boxes: Include multiple-choice, dropdown, or text-based questions.
- Image, PDF, and Video Boxes: Embed media files for reference.
- Signature Boxes: Allow users to sign forms digitally.
- User Upload Boxes: Enable users to upload their own images or files.
- Section Boxes: Organize and structure the form into sections.
- Click Save to save your progress or Publish to finalize the form.
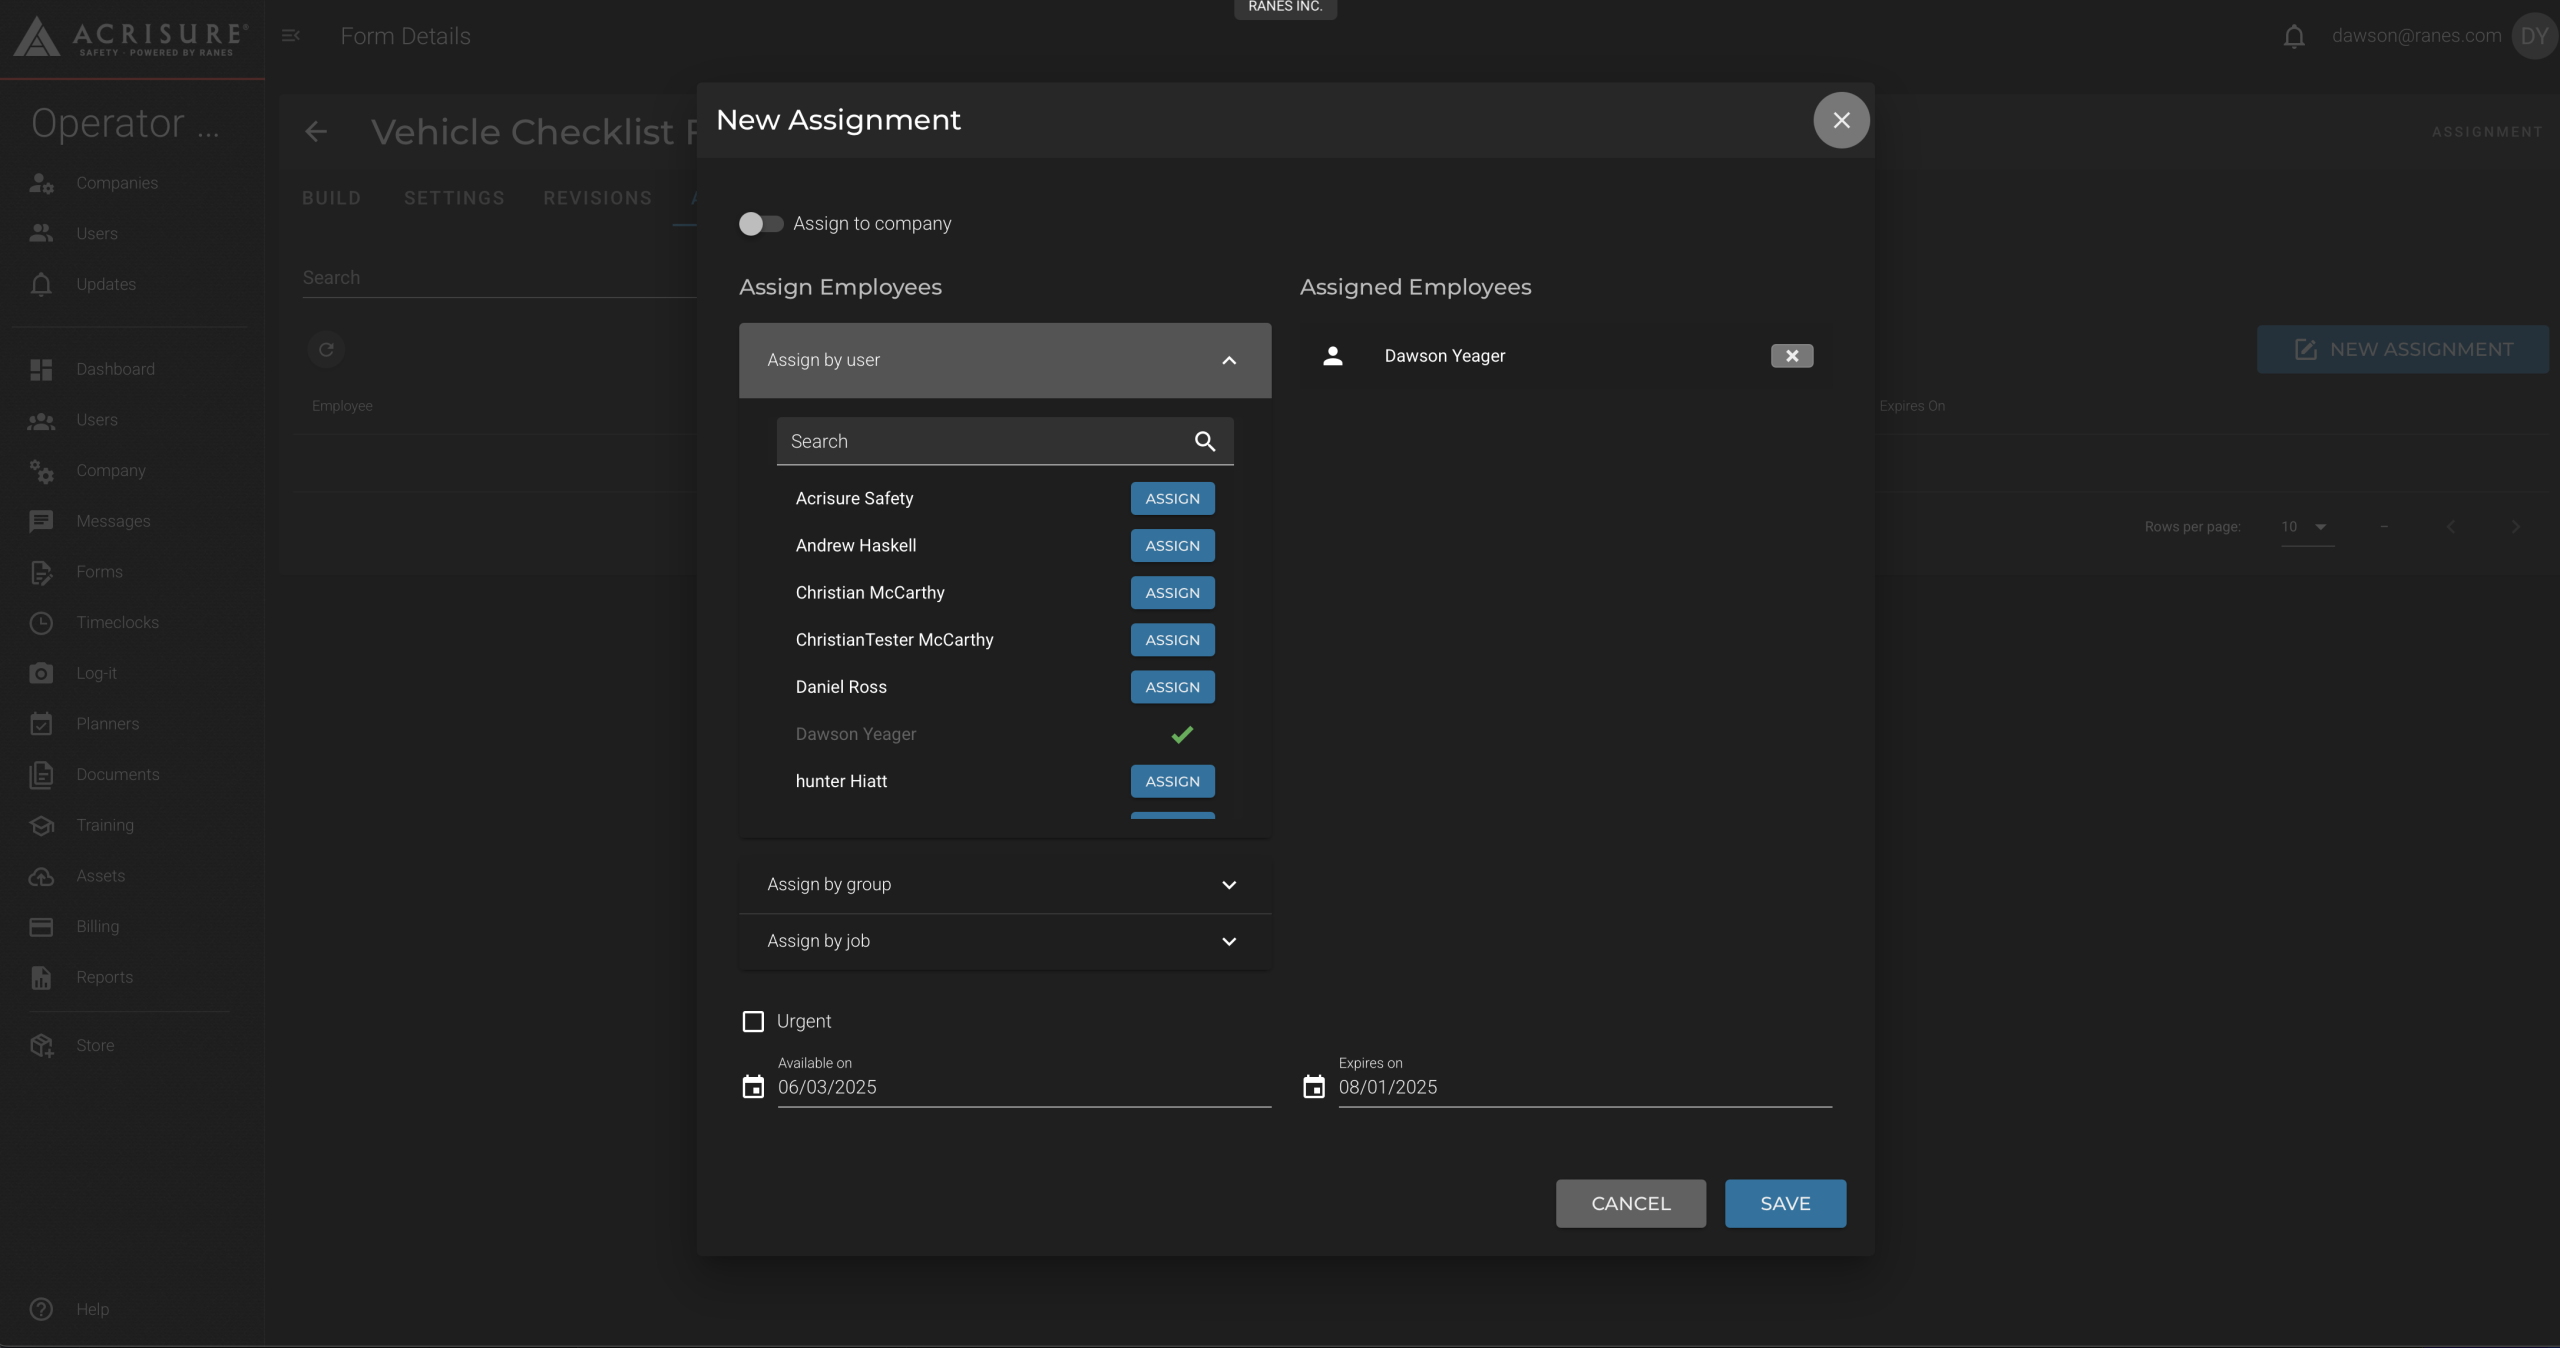
Assigning Forms #
Once a form is saved and published, you can assign it to users or groups:
- Click on the form you want to assign from the Forms dashboard.
- Navigate to the Assignments tab.
- Choose to assign the form by:
- Individual Users: Search for and select specific employees.
- Groups: Assign the form to predefined groups.
- Jobs: Assign the form based on job roles.
- Company-Wide: Make the form available to all users in the library.
- Click Save to confirm the assignment.
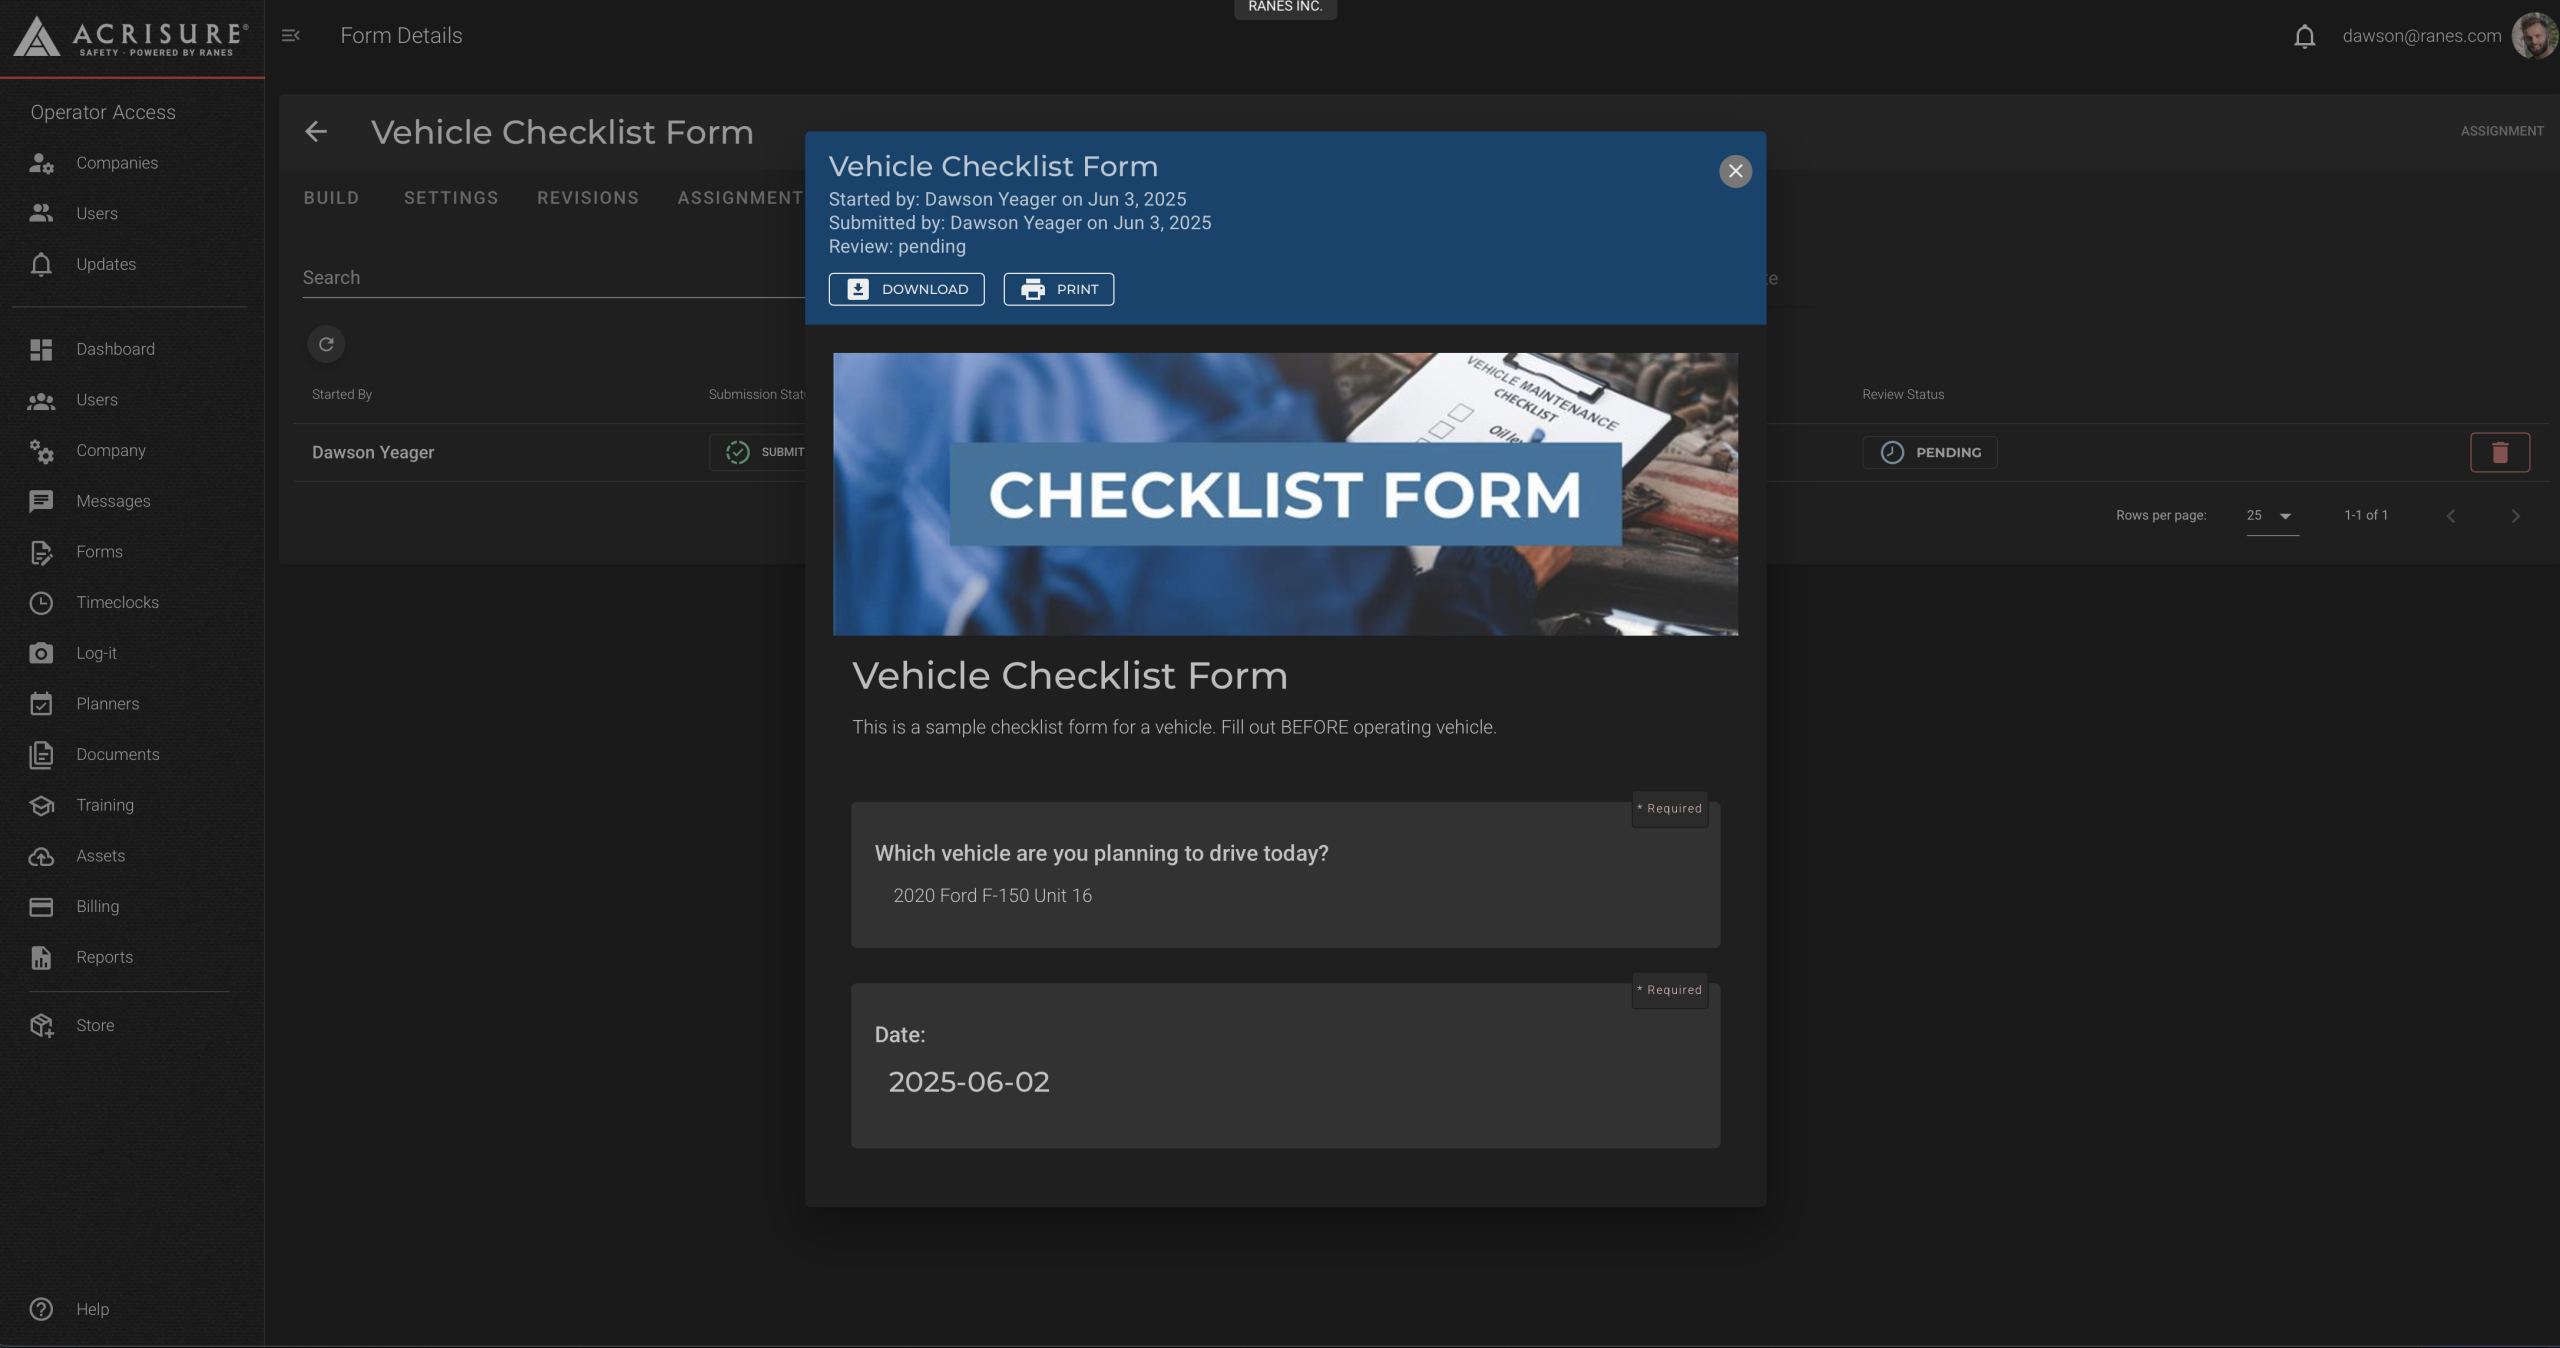
Viewing Form Submissions #
To view submitted forms and their data:
- Click on the form you want to review from the Forms dashboard.
- Navigate to the Submissions tab.
- Click on a submission to view its details, including answers, uploaded files, and signatures.
- Download or print the submission if needed.
Tips for Using Forms #
- Make Questions Required: Use the required option for critical questions to ensure users complete them.
- Save and Publish: Forms must be saved and published before they can be assigned to users.
- Enable Submission Alerts: Set up notifications under the form settings to be alerted when a form is submitted.
- Use the Library: Make forms accessible in the library for unlimited use by all team members.
Pro Tip: Use section boxes to organize forms into logical parts, making them easier for users to navigate and complete.


