Table of Contents
How to Use the Document Library and Organize and Assign Documents #
The Document Library feature in the Admin Portal allows Global Admins to store, organize, and assign documents. This includes files such as PDFs, videos, links, and even PowerPoint presentations. Learn how to create folders, upload assets, and set access permissions for individuals, groups, or the whole company.
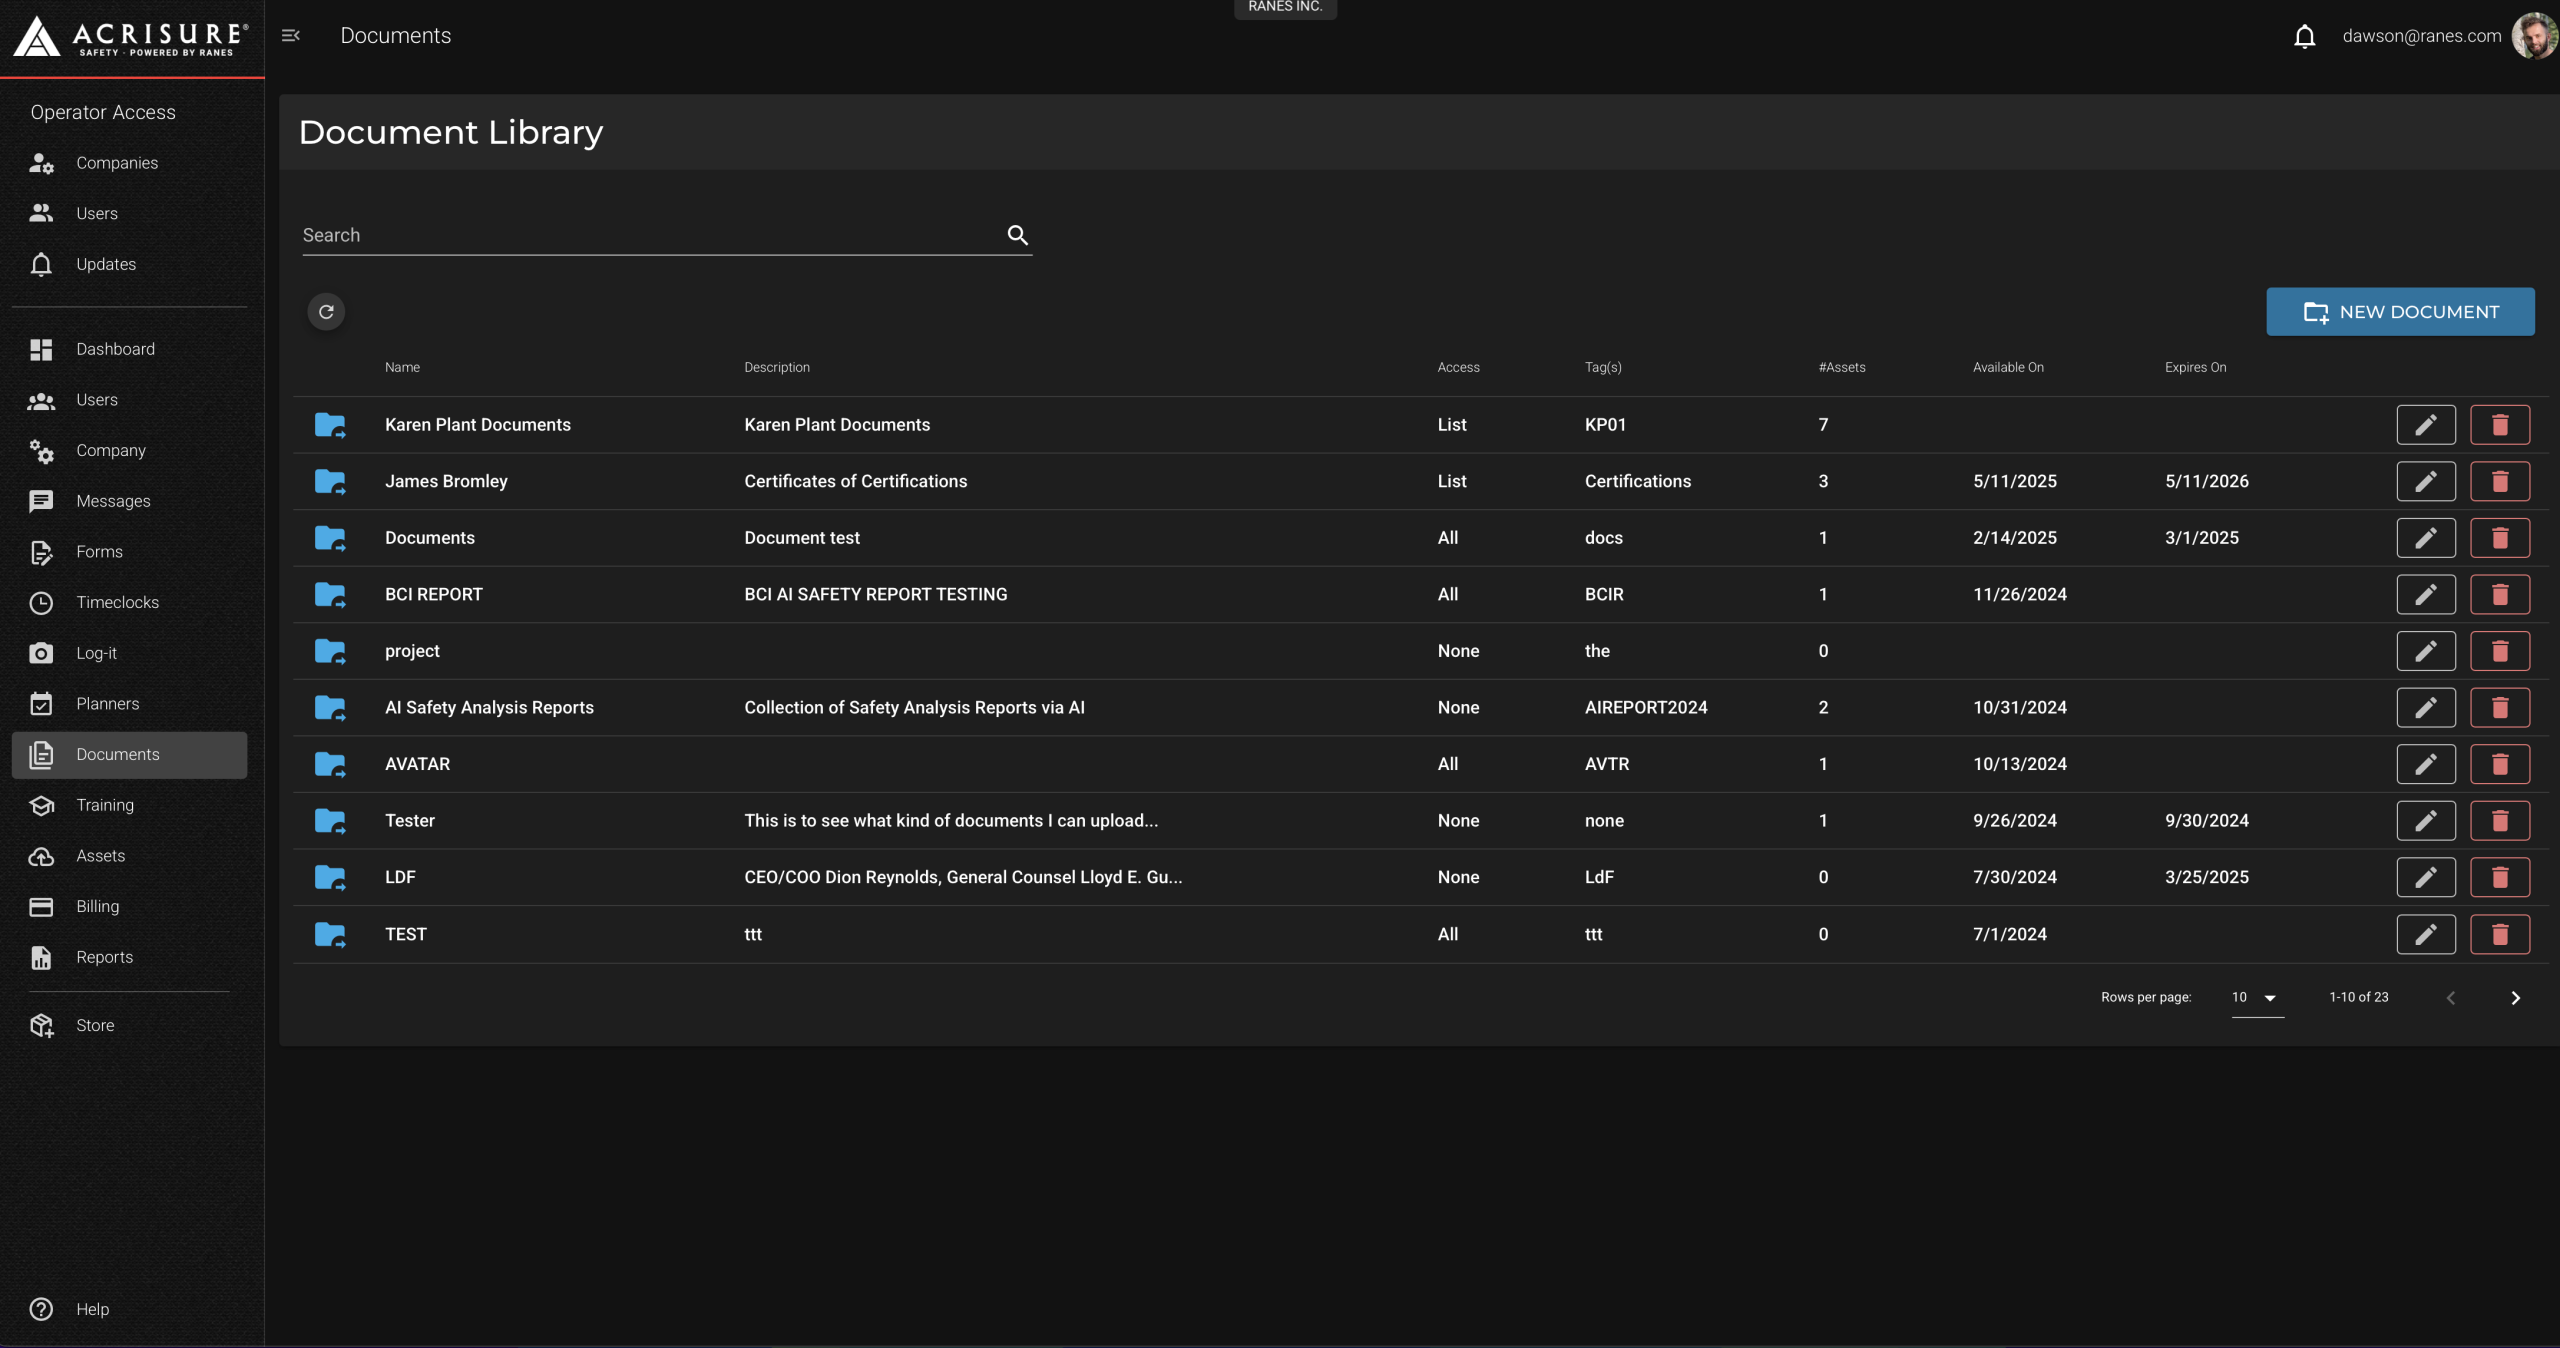
Accessing and Navigating the Document Library #
To begin managing your company’s documents, follow these steps:
- Log in to the Admin Portal.
- From the left navigation bar, click on Documents.
- The Documents Library will display your existing folders and stored files. You can:
- Search for folders using the search bar.
- Edit or delete existing folders with the corresponding icons.
- Click the New Document button to create a new folder.
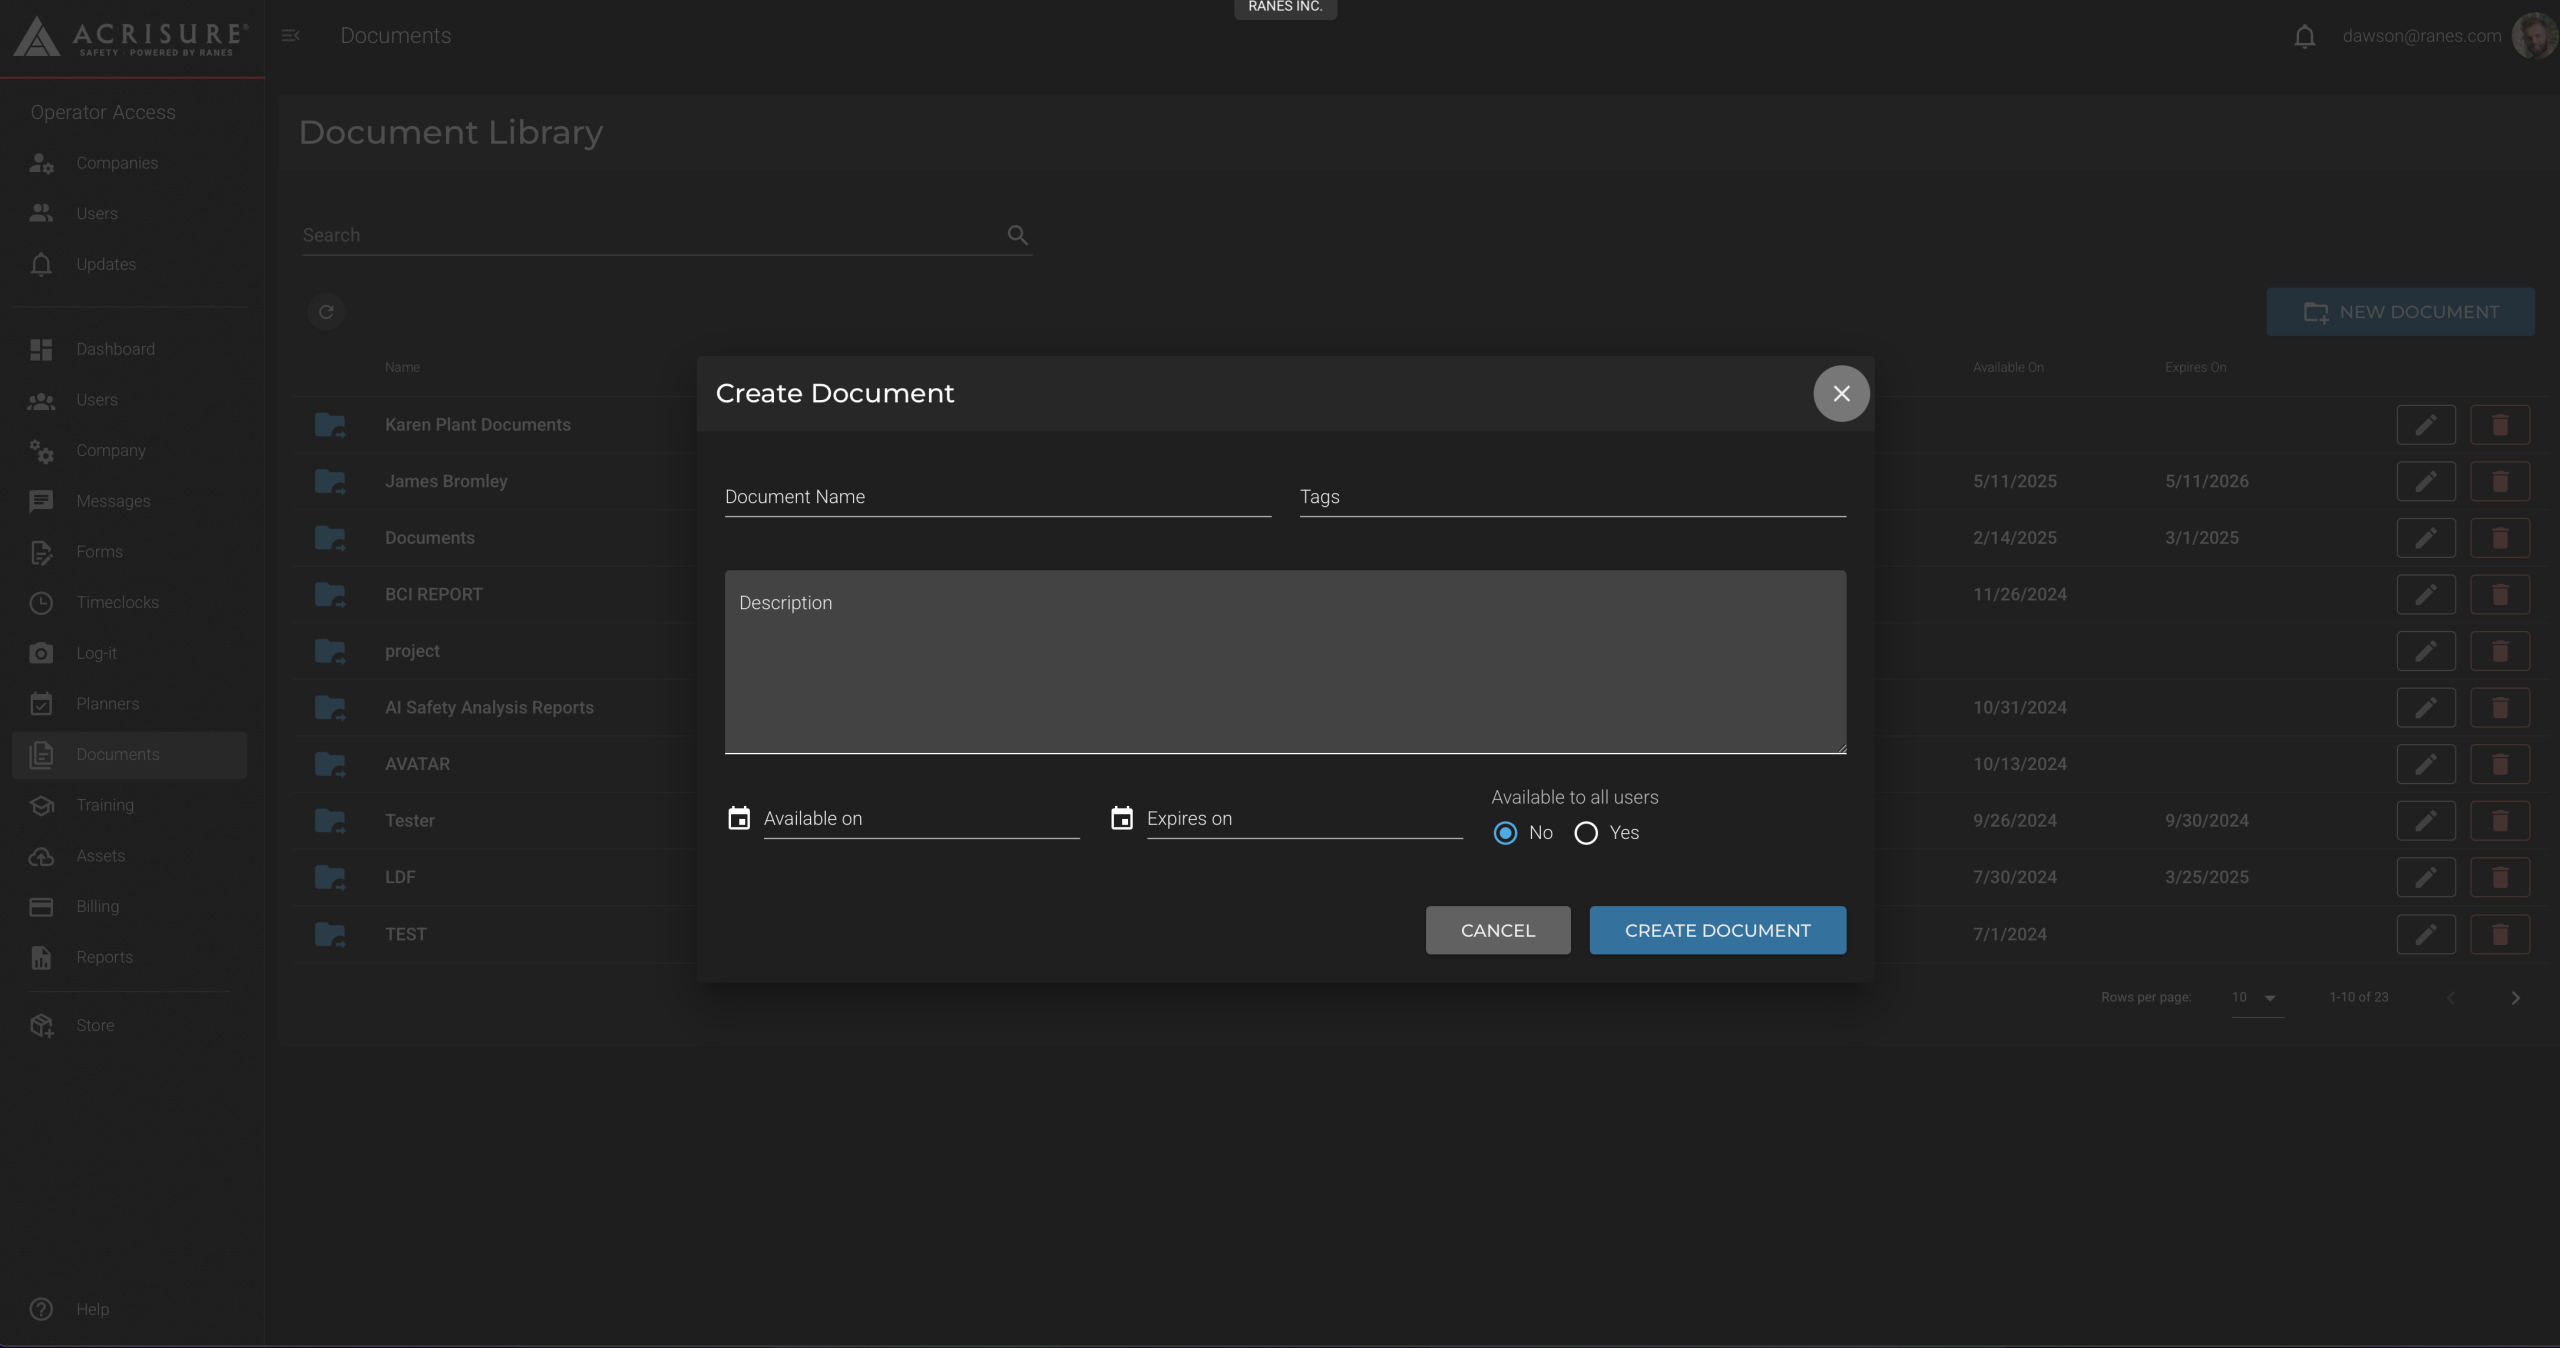
Adding a New Document #
To add a new folder and store your documents, follow these steps:
- Click the New Document button.
- In the Create Document popup, fill out the following information:
- Document Name: Provide a name for the folder.
- Tags: Add tags to make the folder easier to search.
- Description: Describe the purpose of the folder.
- Available On and Expiry Date: Set when the folder will be available and when it expires.
- Access Permissions: Choose whether the folder is available to all users or restricted.
- Once completed, click Create Document to save the folder.
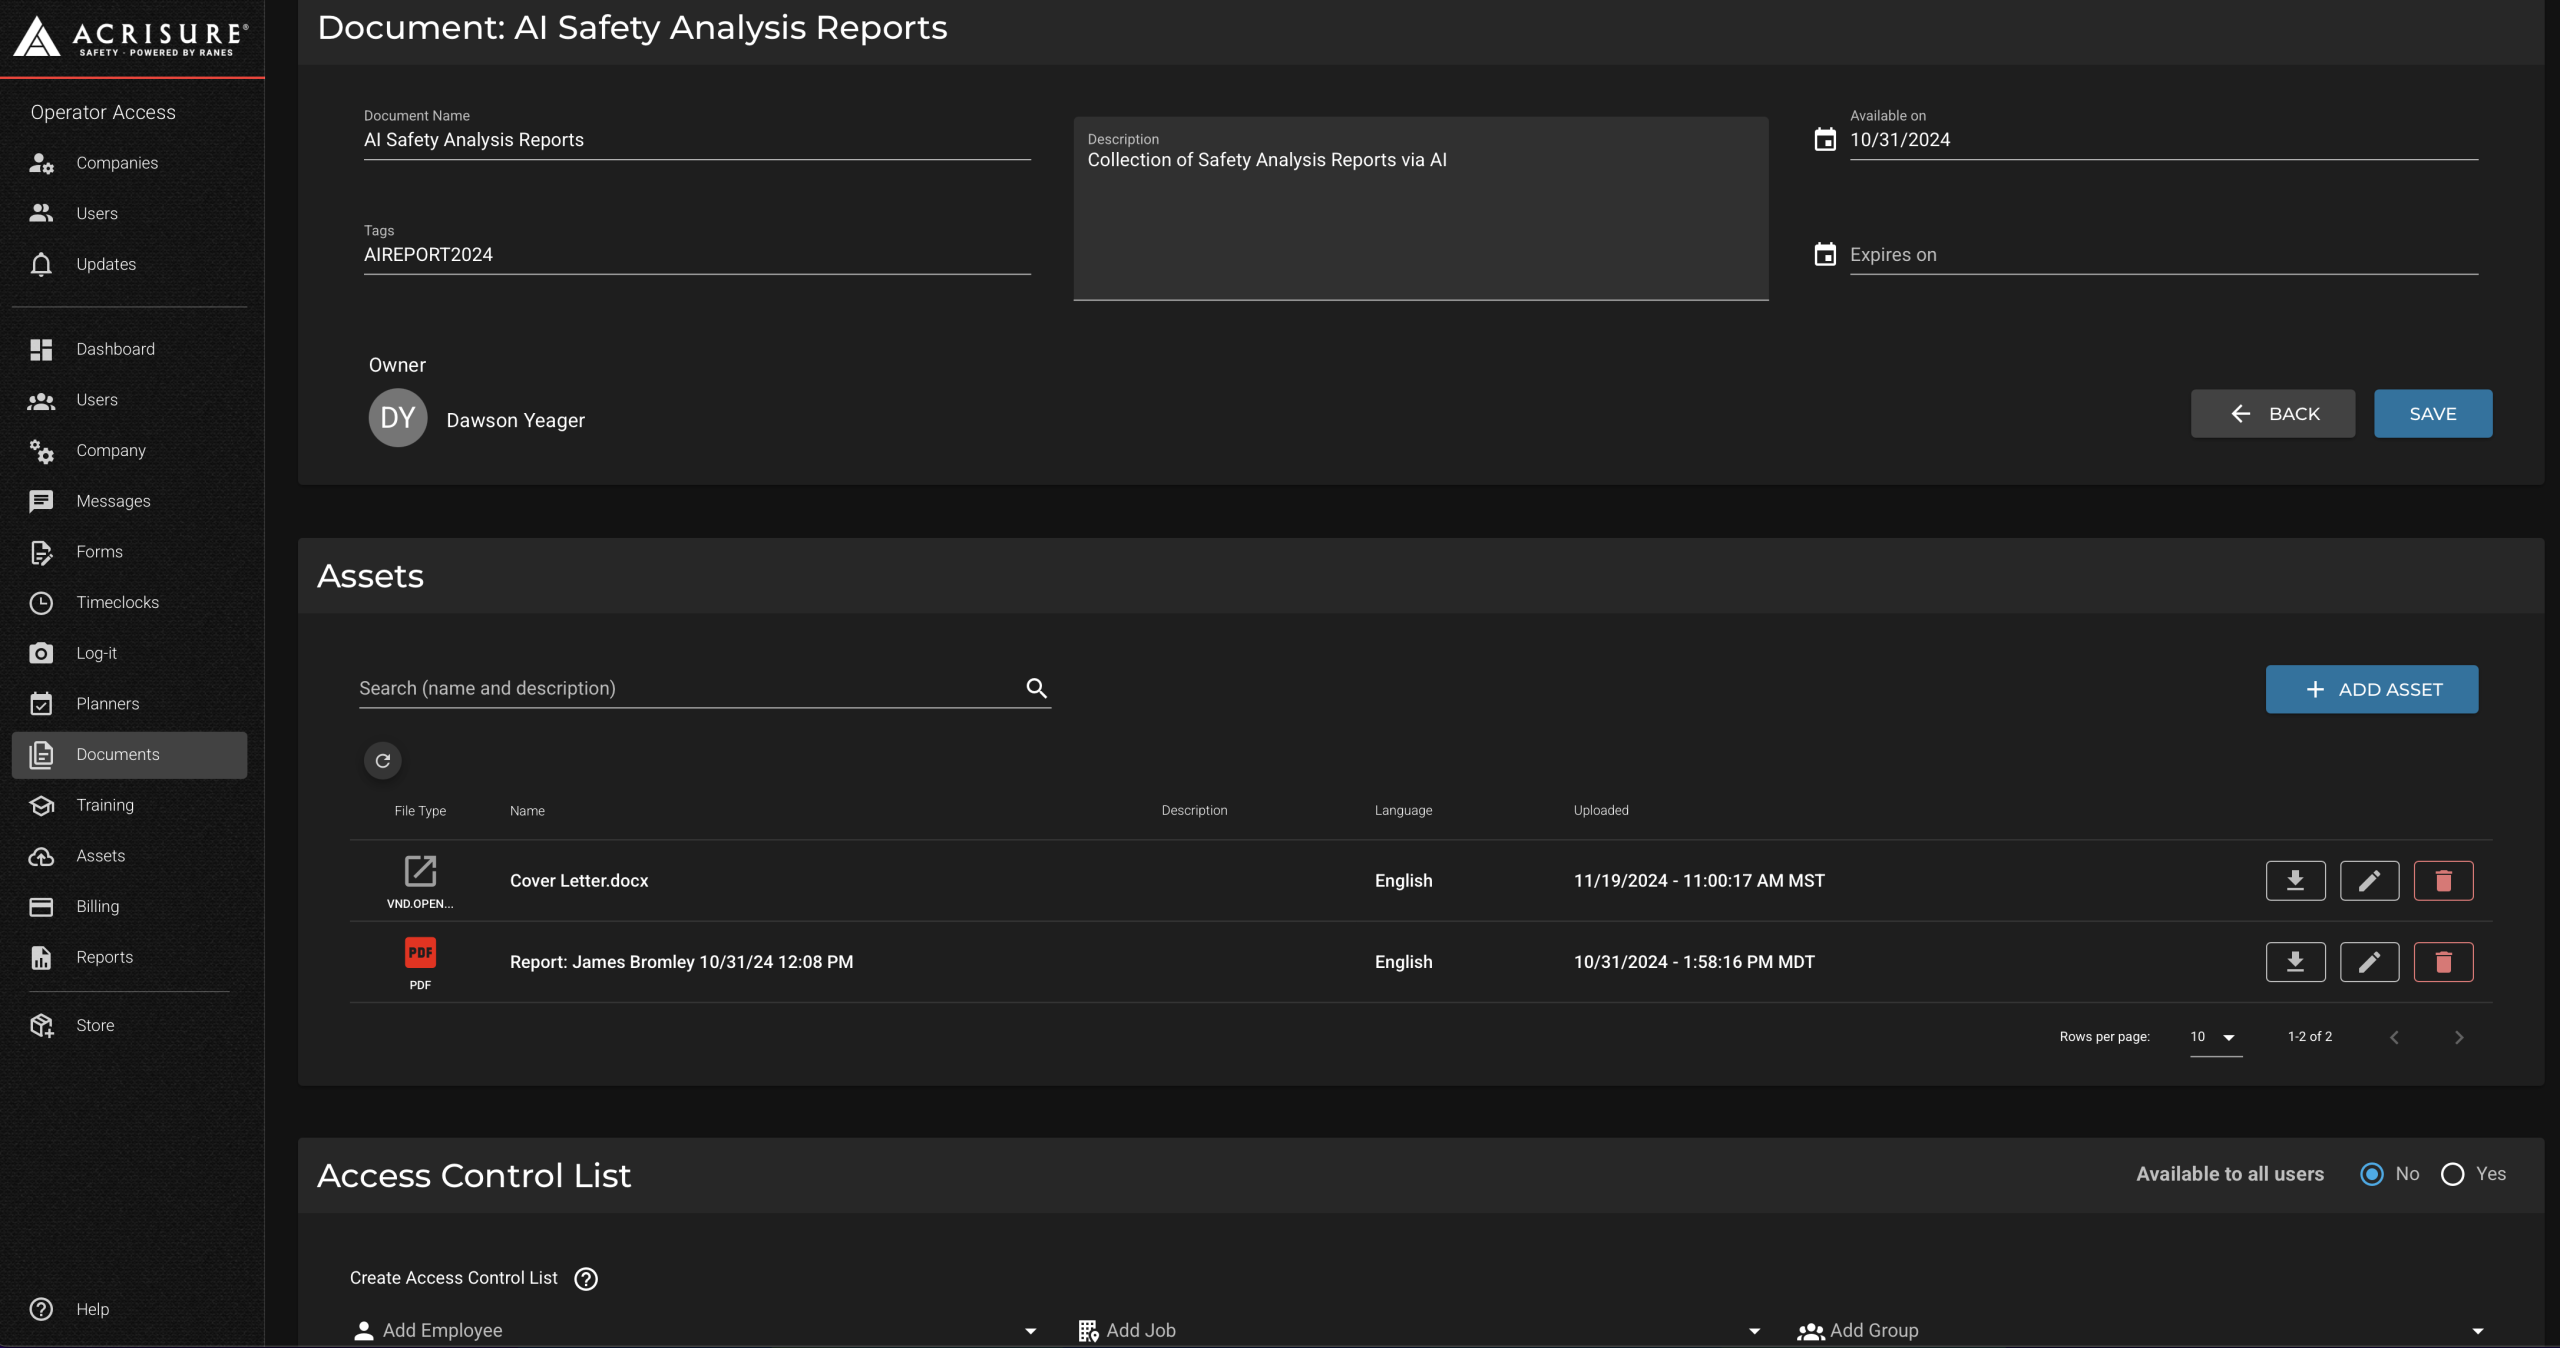
Managing Assets Within Folders #
After creating a folder, you can add and manage assets such as PDFs, images, videos, and links:
- Click on the folder you want to manage.
- Inside the folder, click the Add Asset button to upload files.
- Fill out the asset details, including name, description, and file type, then upload your file.
- Click Save once your upload is complete.
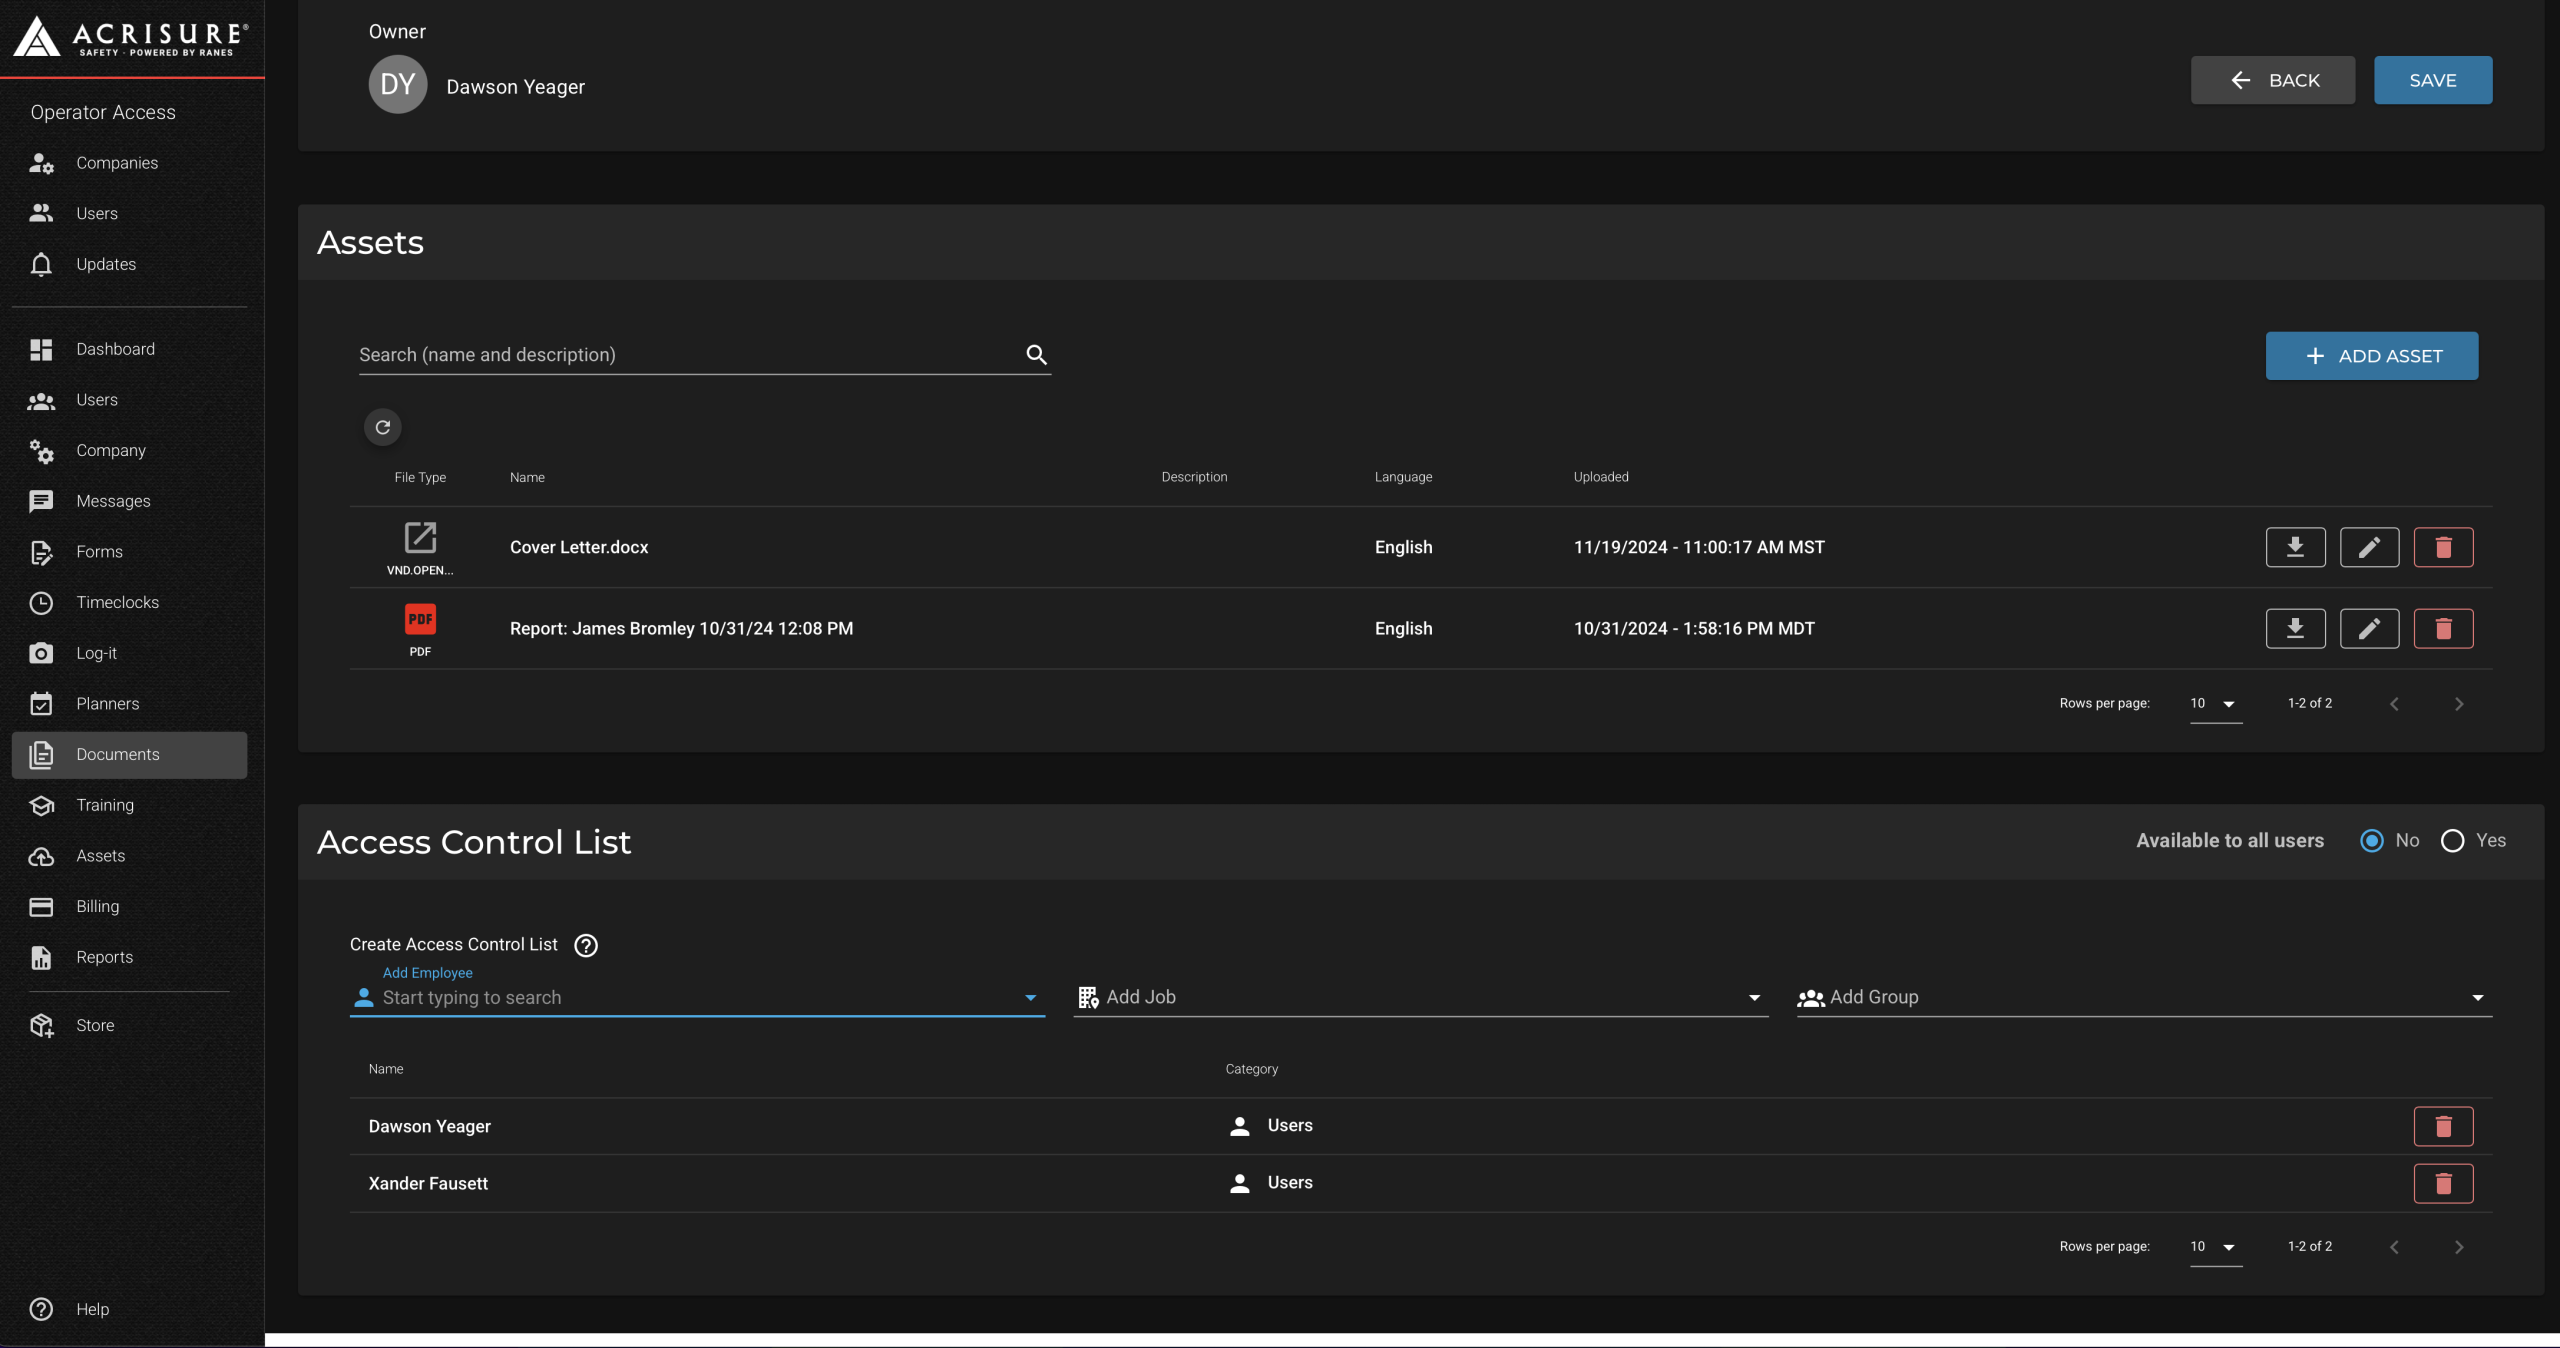
Setting Access Permissions #
The Document Library allows you to control who can view or manage each folder using the Access Control List:
- Scroll to the Access Control List section at the bottom of the folder settings.
- You can assign access to:
- Individual users: Search for and add employees by name.
- Groups: Set access for predefined groups.
- Specific jobs: Assign folder access based on job roles.
- The entire company: Select the option to make the folder globally accessible.
- Click Save to confirm changes.
Tips for Organizing Documents #
- Use Clear Folder Names: Ensure folders are named in a way that makes their content easily identifiable.
- Leverage Tags: Add descriptive tags to help users quickly find relevant folders and files.
- Customize Access: Set access permissions to match your organizational structure, such as creating individual employee folders or company-wide safety documents.
- Assign Expiry Dates: Use expiration dates to control the availability of time-sensitive or outdated documents.
Pro Tip: Organize folders by purpose, such as “Individual,” “Groups,” or “Company-Wide,” to streamline user access and navigation.


