Main Dashboard Overview #
Upon signing into the Admin Portal as a Global Admin, you are directed to the Main Dashboard. This provides a snapshot of core modules and actionable insights into different areas of the portal. Learn how to navigate and utilize the features available on the dashboard.
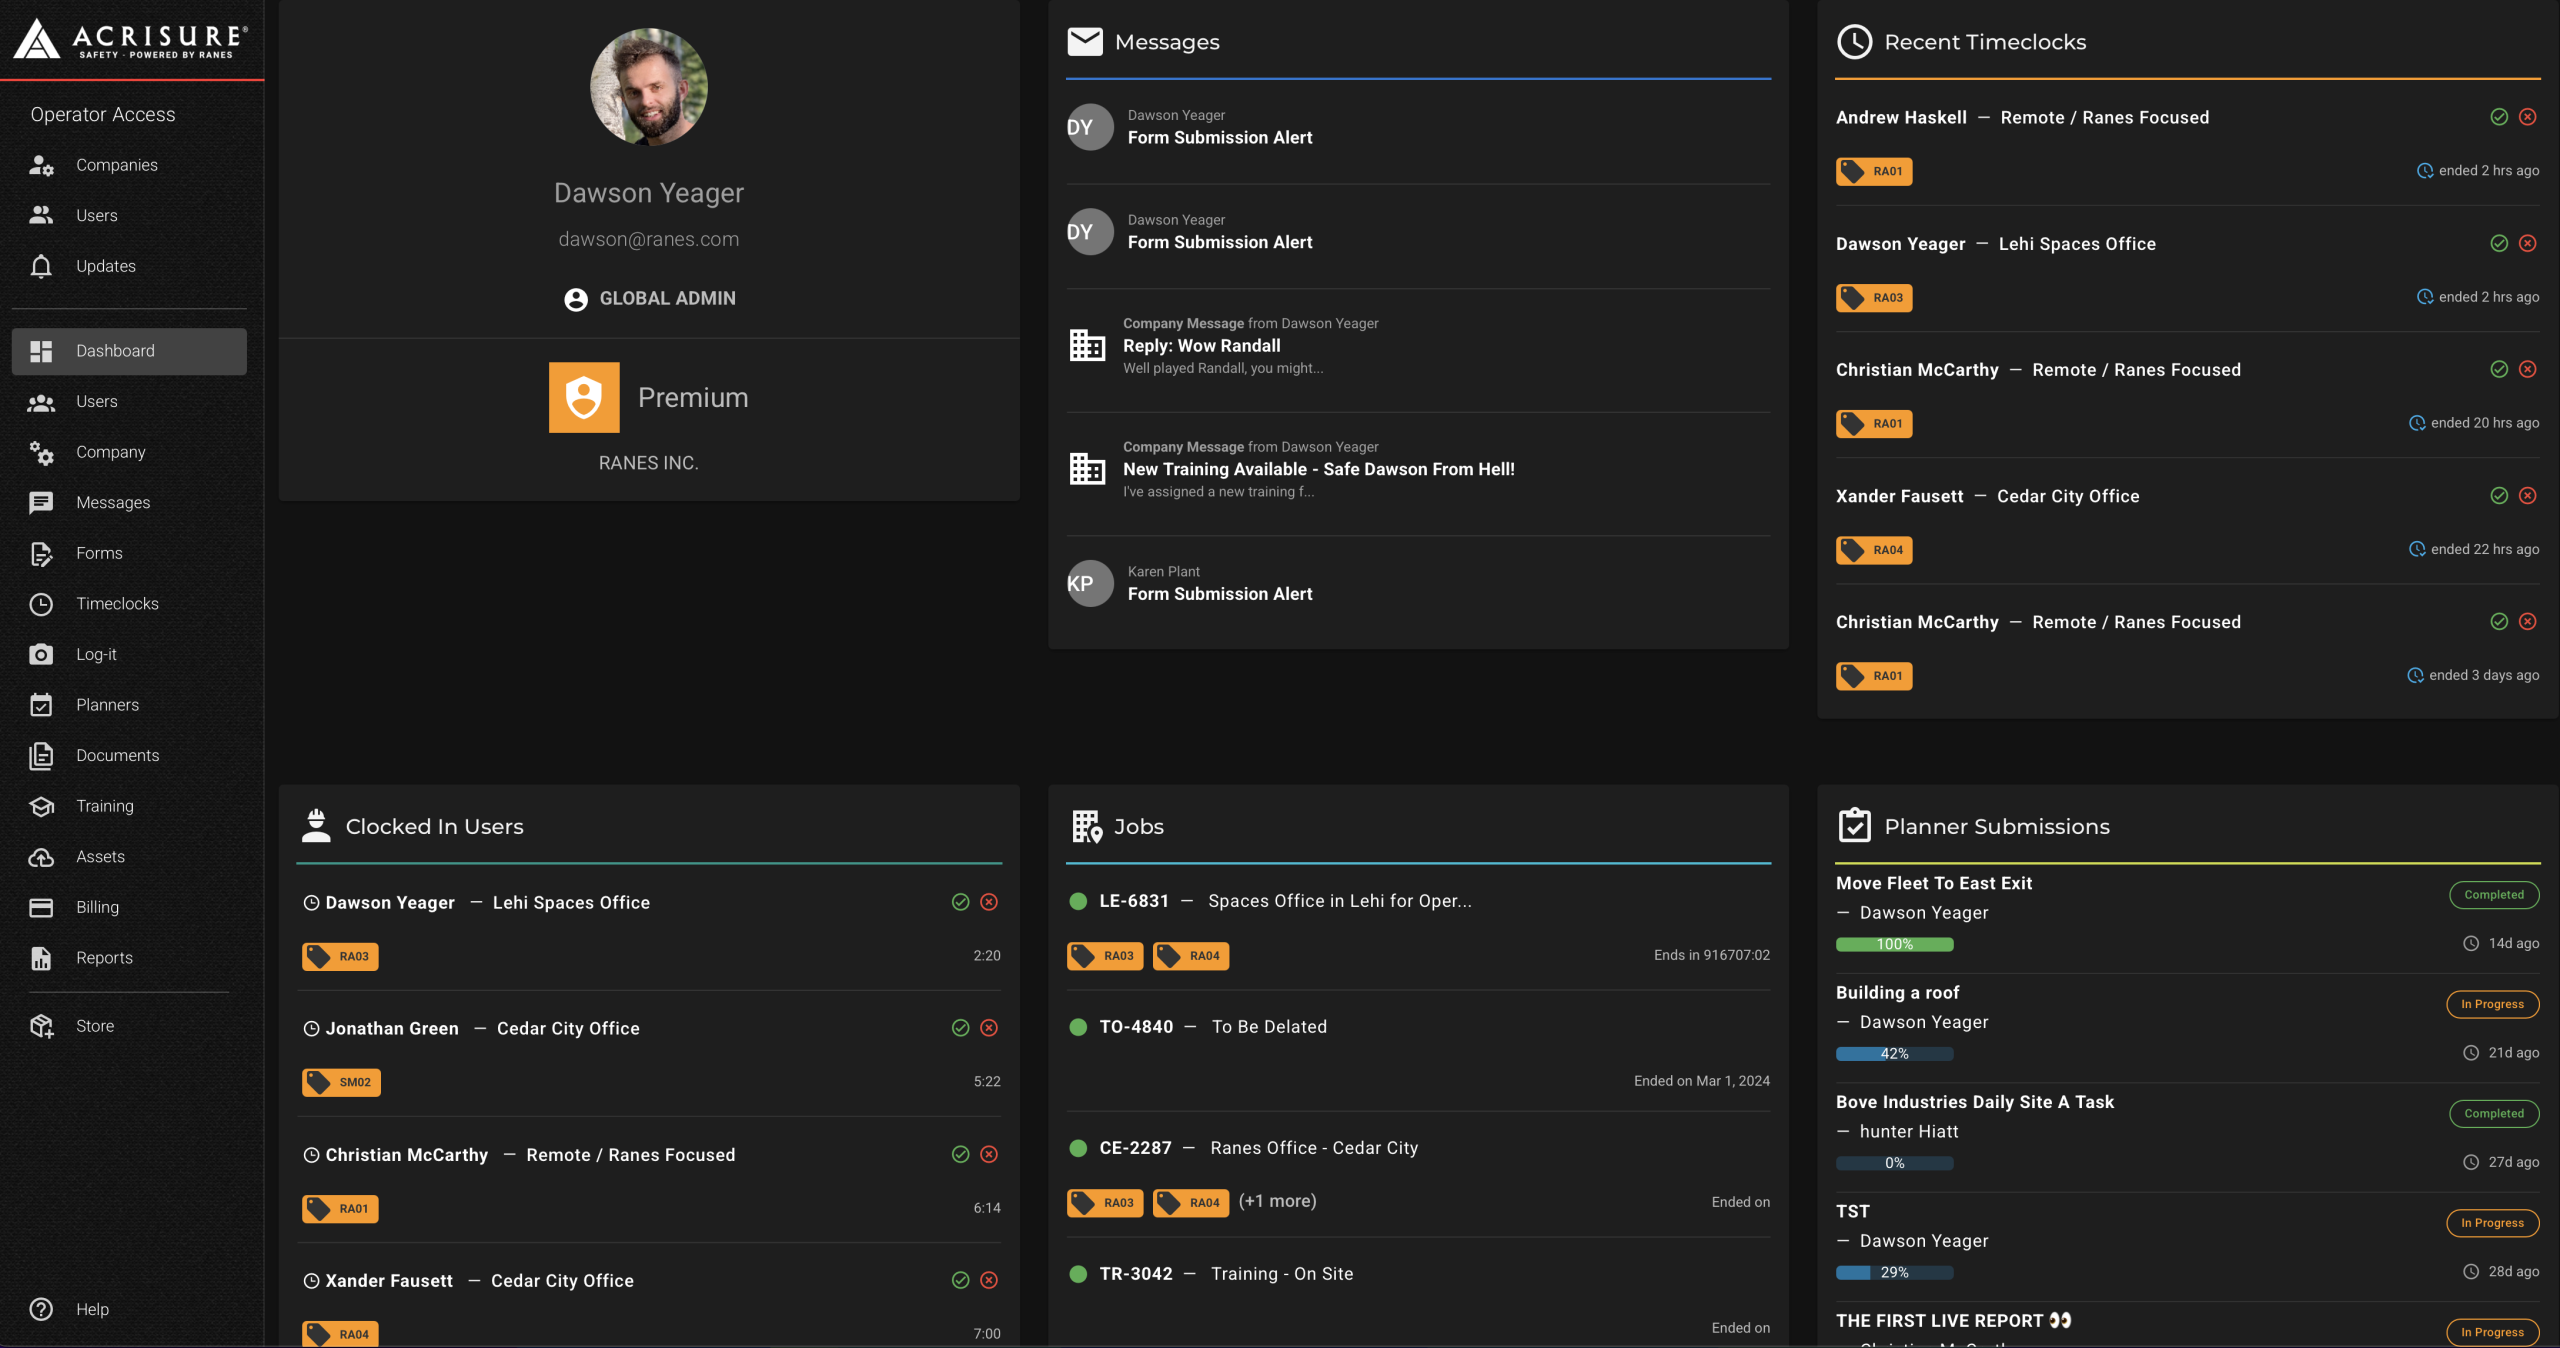
What is the Main Dashboard? #
The Main Dashboard acts as the central hub for admins. It displays six boxes that summarize different aspects of the portal, allowing for quick access and actionable insights. Each box provides clickable links to navigate directly to its respective module or feature for detailed exploration.
- Upper Left: General account information including your name, company, and role.
- Upper Middle: Recent messages within the system.
- Upper Right: Recent timeclock entries.
- Bottom Left: Active users currently clocked in.
- Bottom Middle: Snapshot of jobs and cost codes with start and end dates.
- Bottom Right: Updates on recent planner submissions, including completion percentages.
Navigating the Dashboard #
Each box on the dashboard provides one-click access to its respective module or feature for further exploration. Here’s what you can expect:
General Account Information #
Located in the upper left, this box displays:
- Your Name.
- Your Company.
- Your Role in the organization.
Click on the circular image to edit or view your account details.
Recent Messages #
Located in the upper middle, this box highlights the latest messages sent or received within the system. Each message includes details such as the sender, type, and timestamp.
- Click on any message to open the Messages Module for further actions like reply or archive.
Recent Timeclock Entries #
Located in the upper right, this box lists recent timeclock entries. Each entry includes:
- Employee Name and Job or Location.
- Check-in/Check-out timestamps.
Click on any timeclock entry to view detailed logs in the Timeclocks Module.
Clocked-In Users #
Located in the bottom left, this box displays which users are currently clocked in. This includes:
- Employee Name.
- Job or Location information.
Clicking on any user will direct you to their check-in details within the Users Module.
Jobs and Cost Codes #
Located in the bottom middle, this box provides insight into active jobs and cost codes. Information includes:
- Job Names and Descriptions.
- Start and End Dates.
- Associated Cost Codes.
Click on any job or cost code to open detailed information in the Jobs Module.
Planner Submissions #
Located in the bottom right, this box summarizes planner submissions. Information includes:
- Planner Titles and Assigned Employees.
- Submission Status (e.g., Completed or In Progress).
- Completion Percentages.
Click on any planner submission to view and manage it in the Planners Module.
Best Practices #
- Check Regularly: Monitor the dashboard frequently for updates in key areas like messages, timeclock entries, and planner submissions.
- Engage with Users: Use the clocked-in users and job information to ensure tasks and responsibilities are being managed effectively.
- Utilize Links: Clicking on dashboard boxes leads to more detailed views where actions can be taken directly.


